La Maison Tricotée
Matapedia Socks
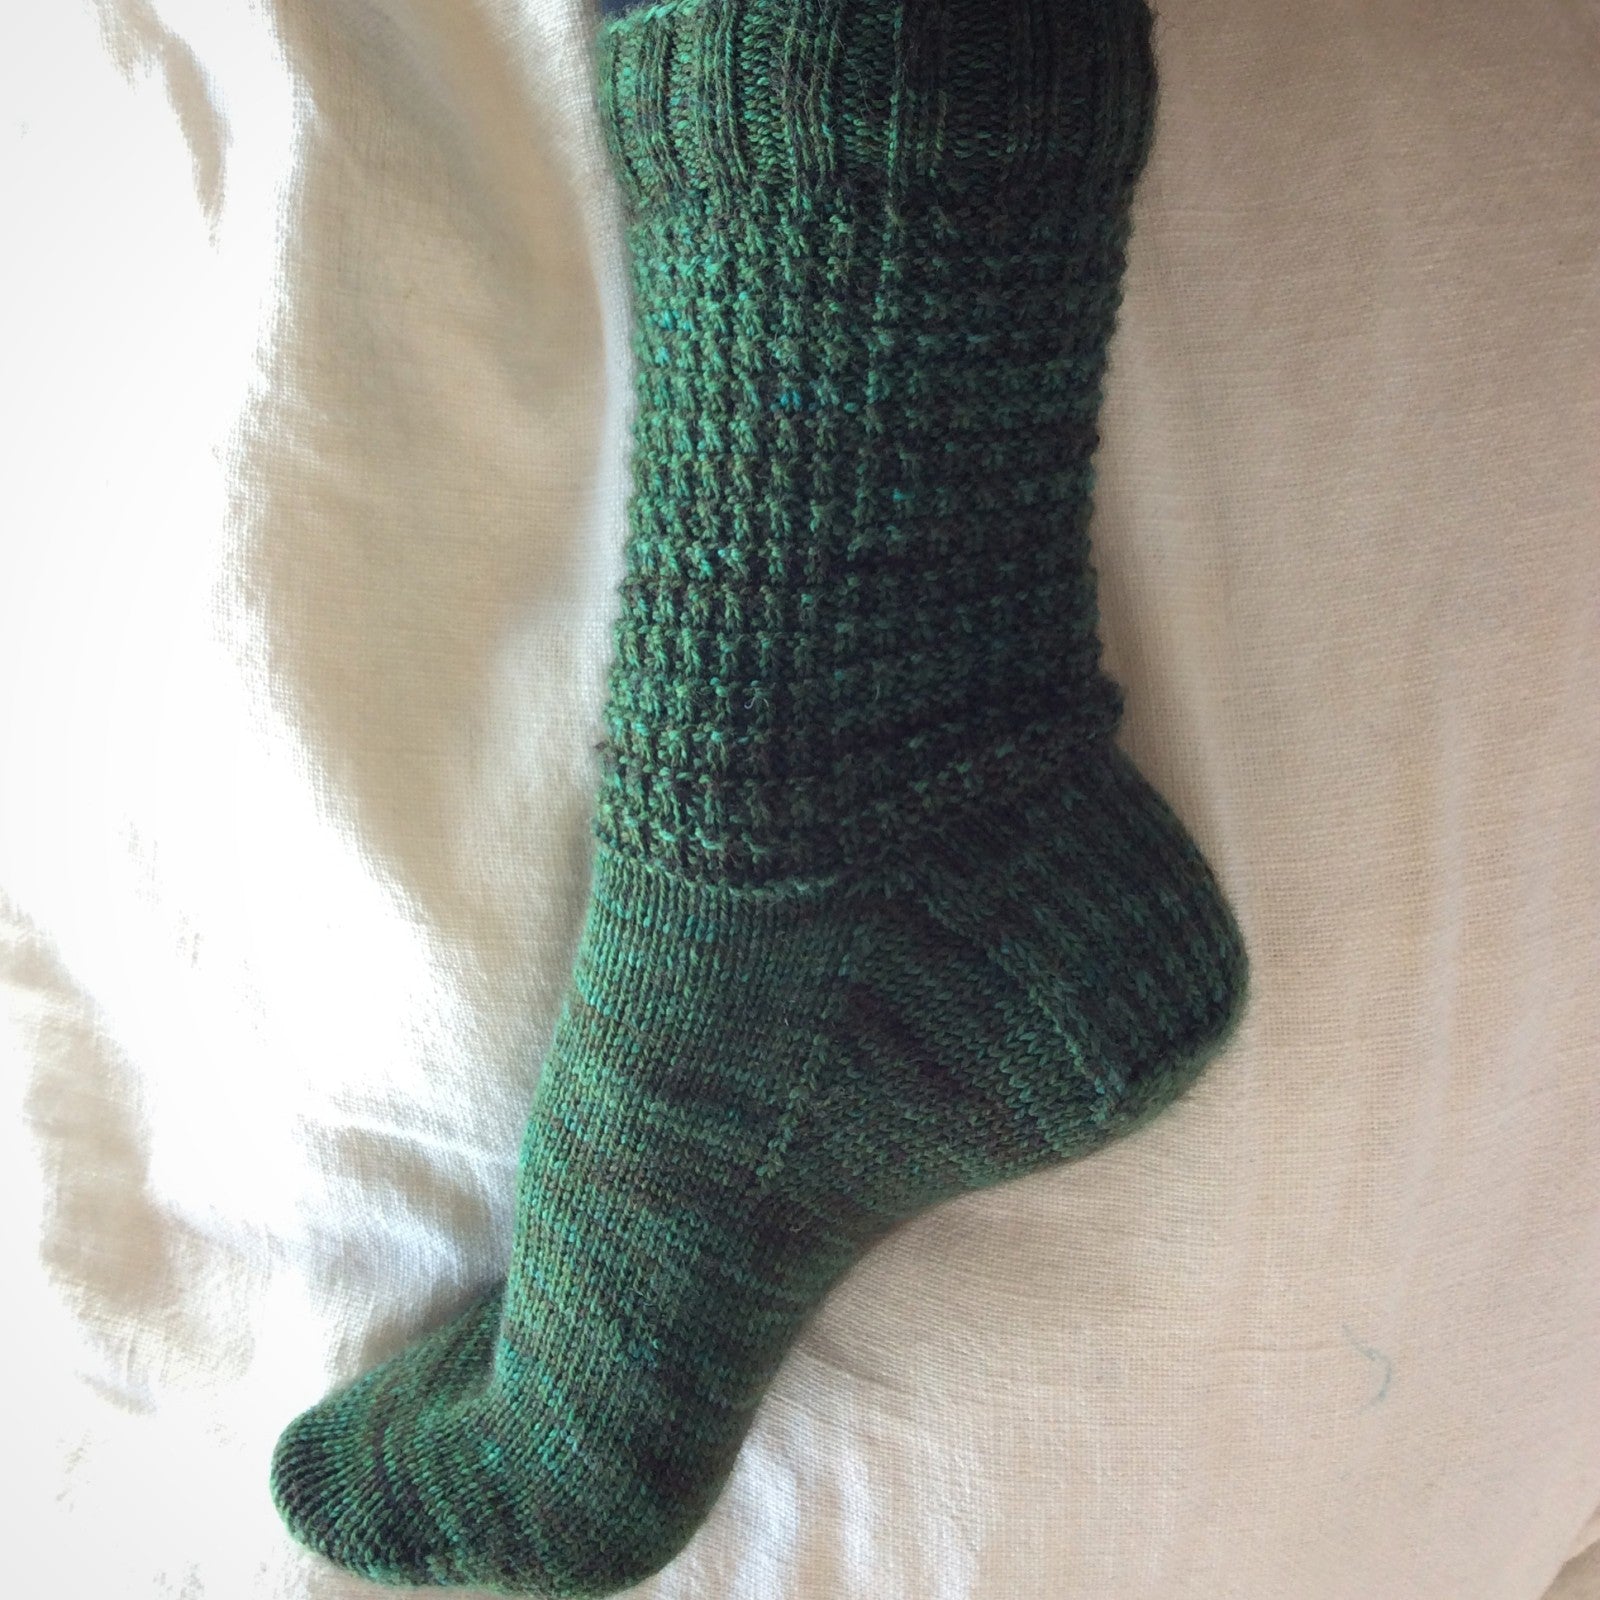
Matapedia Socks
Couldn't load pickup availability
Matapedia is a green region of Quebec. Its name comes from the Micmac language “At the junction of the rivers”. This describes its wilderness landscapes well. Danièlle, the creator of Couleurs Mouton was inspired by Matapédia to create this color combining different shades of green. When I discovered it, I was in love and it was my turn to be inspired by Matapedia!
Size
Women
Material
- 1 skein of Socky wool by Couleur Mouton (80% merino wool, 20% nylon)
- 1 set of 2.25 mm double-pointed needles
- 1 wool needle
Abbreviations
- meD
- Knit a stitch, meV = Purl a stitch.
Sample
- 32m
- 10cm with 2.25mm needles in circular stockinette stitch
Important : check the sample and adjust the needle number if necessary.
Broken rib stitch
row 1: *1 meD, 1 meV* repeat all around.
row 2: like row 1.
row 3: Right side.
row 4: Reversed.
Repeat these 4 rows.
Realization
The sock is started with the ankle: Cast on 64 stitches and distribute them over the set of 2.25 mm double-pointed needles. Join in the round taking care not to twist the stitches.
Step 2 - The ankle
Knit in 2/2 rib for 4 cm. Continue in broken ribs (see explanation above) until the piece measures 16 cm (including the ribbed edge).
Step 2 - The Heel
Work only on half of the stitches back and forth as follows:
row 1: * Slip 1 stitch, knit a stitch * repeat from * to * over 32 stitches then turn the work, leaving the other stitches on hold.
row 2 (you are now on the wrong side of the work): Slip a stitch then purl 31 stitches.
Repeat rows 1 and 2 until the heel is 6.5 cm high and finish with row 1 (right side - 33 rows worked).
Step 3 - The heel cup
row 1 (wrong side of work): Purl 20 stitches, purl 2 stitches together, 1 stitch and turn the work, leaving the next 9 stitches waiting on the needle.
rg 2 (right side of work): Slip a stitch, knit 9 stitches, a simple overlock, knit a stitch and turn the work, leaving the next 9 stitches waiting.
row 3: Slip a stitch, purl to the last stitch before the stitches on hold (a small space in the knitting separates them), purl 2 stitches together (take this last stitch with the first
stitch left on hold), then knit a stitch and turn the work.row 4: Slip a stitch, knit until the last stitch before the stitches on hold (a small space in the knitting separates them), make a simple overlock by slipping the last stitch, knit the next stitch on hold then cast off slipped stitch over the knitted stitch. Then, knit another stitch and turn the work.
Repeat rows 3 and 4 until there is only one stitch left on each side and finish with these two rows:
row 1 (wrong side): Knit up to one stitch before the stitch on hold then knit the 2 stitches together, turn.
row 2: Knit up to one stitch before the stitch on hold then knit 1 single overlock.
There are 20 stitches left for the heel. Do not turn the work but turn it 90°. Go back up by knitting them, along the left side of the heel 17 stitches. With a new needle (needle 2), knit 16 stitches, with a new needle (needle 3), knit 16 stitches, with a new needle (needle 4), pick up 16 stitches along the right side of the heel and knit in succession 10 heel stitches.
The stitches are now distributed as follows:
- needle 1 (start of round): 10 stitches from the heel + 16 stitches picked up = 26 stitches.
- needle 2 (top of the foot): 16 stitches.
- needle 3 (top of the foot): 16 stitches.
- needle 4: 16 stitches picked up + 10 stitches from the heel = 26 stitches.
Step 4 - The gusset
Alternate a row of decreases with a right row until you reach 16 stitches on needles 1 to 4 as follows:
row of decreases
- needle 1: Knit to the last 3 stitches, 2 stitches together, 1 stitch.
- needle 2 and 3: All right side up.
- needle 4: Knit a stitch, a simple overlock and finish the needle.
Then, when you have returned to 64 stitches, continue straight on until 15.5 cm in length measured from the heel line (if you want a shorter or longer sock, add or remove your centimeters there).
Step 5 - Tiptoe
Decrease for the toe by alternating a row of decreases with a right row as follows:
row of decreases
- needle 1: Knit to the last 3 stitches, 2 stitches together, 1 stitch.
- needle 2: A simple overlock, all in place.
- needle 3: Knit to the last 3 stitches, 2 stitches together, 1 stitch.
- needle 4: A simple overlock, all in place. Then, a right row.
When you obtain 6 stitches on each needle, knit with needle 4 the 6 stitches from needle 1 and distribute the stitches as follows:
- needle (bottom of foot): 12 stitches (needle 4 + needle 1)
- needle 2 (top of foot): 12 stitches (needle 2 + needle 3)
Sew the sock using kitchener stitch.
There are some great tutorials online for this specific sewing. I recommend the Knit Spirit online tutorial.
Share
